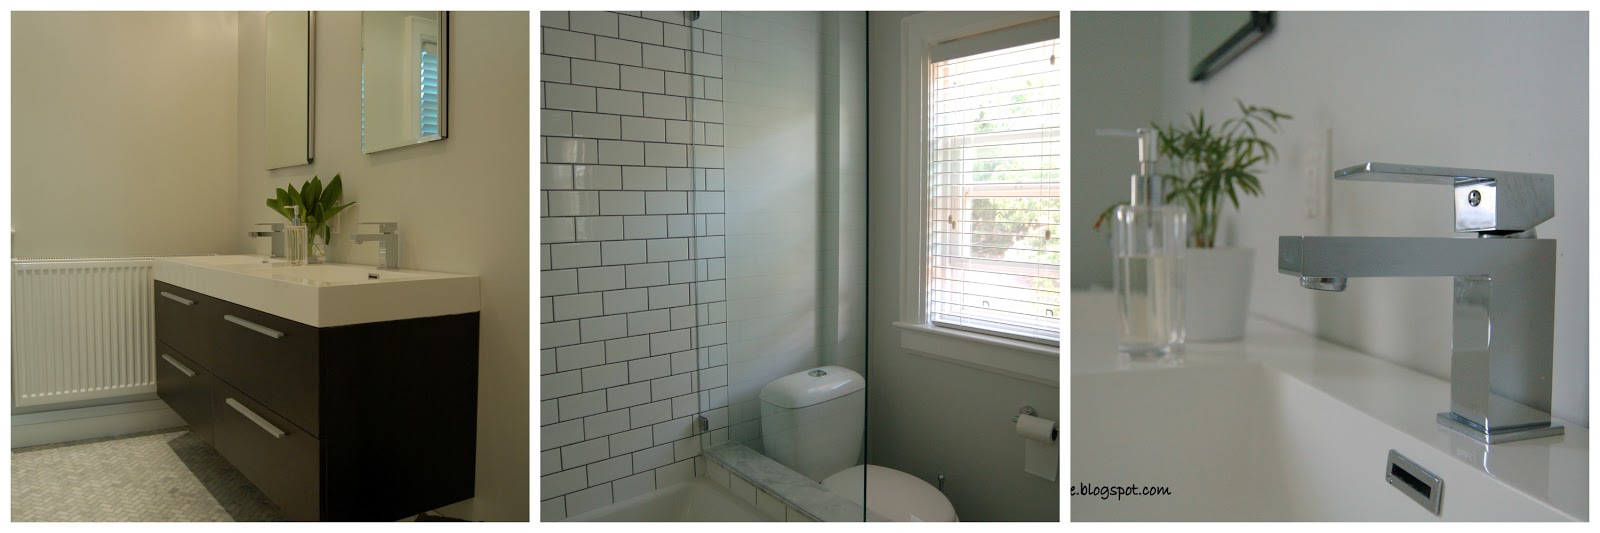
Showing posts with label before and after. Show all posts

Tuesday, September 2, 2014

Basement Reno - the {almost} finished product

Ok, I'm a bit late posting this but the important thing is - it's here! The basement is pretty much done, and we are SO happy with it. All that's left is to get radiators installed (we decided to go with new, slim Stelrads) and then furnish the space.

As a reminder, you can see what the basement looked like before here, and in progress here.

Behold....the finished basement...
Bottom of the stairs and the door leading to cold storage.

 A closet we added (yay extra storage!) and door leading to the boiler room, bathroom and the laundry room (none of which were updated / touched)

Stairs, painted with porch paint

Closet and eventual "office" area

Since it's a basement and the height is just over 6 feet, we had to use flat doors and have them cut to size. The Mr. had the idea to add trim to the doors to make them more "finished". A simple change that makes a big impact! I wanted large pulls instead of typical door knobs; I think the style suits us and looks much more custom than flat doors.

We are really happy with how everything turned out - from the flooring to the doors to the paint colour (you NEVER know, especially in a basement how paint will turn out). Note that we hired someone to do the work for us - with Owen transitioning to 1 nap a day it would have taken us years to be able to finish it on our own ;) Even with hiring someone, the reno was pretty budget friendly, with most items sourced from big box stores. See below for sources - now for the exciting part, to furnish it!

Flooring - Beaulieu Kamina Oak, HomeDepot
Baseboards, shoe moulding - Lowe's
Paint (trim and doors) - Designer White (Behr); Home Depot
Paint (walls) - Moth Gray at 90% (Behr); Home Depot


Friday, August 8, 2014

Basement reno progress

The basement reno is in progress - it's so exciting when they hang the drywall and you can see a room take shape! It's actually verrrryyyy near the end but I'm going to save the full details for later...


As you can see, we didn't dig down. We have about 6' clearance, and the Mr. happens to be 6', so we are good. :) In all seriousness though, we didn't really want to get into underpinning and digging down just to gain a few inches. I think it's worth it if you're gaining 6 inches or more...and we just didn't need that much more height (or cost, or work). The purpose of this space will be a play area for Owen, a TV area, and a desk. All things you will be sitting for, so the extra height wasn't worth it to us at this point.


Already with the pot lights it is SO much brighter, and the drywall makes it feel like a room. Stay tuned for exciting changes like paint and flooring!!

Monday, July 14, 2014

DIY coffee table and living room refresh - Update!

We have a new coffee table! I mentioned here that we were going to DIY a coffee table. And we did it this weekend...
 

From my previous post, a lot of you liked the Peony fabric option - and I did too, but it would be much better in a room with lighter furniture. Since our floors are dark and our furniture is dark AND visually heavy, we really needed something to brighten the space.

This Centro Mist fabric from Tonic Living was the perfect solution. It's also an outdoor fabric so is a bit more stain resistant and durable for putting our feet up on the table (which we do all the time...)


We changed the pillows (thanks mom for sewing!) to give the whole room a bit of a refresh. The gray fabric is Cameron in Storm, and the toile is Neo Toile in Coral (I am in looovvveee with this fabric).

 What do you think?

Tuesday, June 24, 2014

Another reno - it's basement time!

I started my mat leave with a project (tile and baseboards) and I will lead out with a project (although this one better be done wellllll before I go back to work in October!)

We are pretty excited to renovate our basement - shortly after having Owen we realized just how much stuff these little guys use/need/get...and to keep the disaster that is currently our main floor at bay as Owen grows up, we decided we should finish our basement. Here are some photos of the space (sorry for the crappy pics - it's a dark basement so I didn't waste my time trying to make it look better than it is!)
This will be where the couch lives...

 To the back left is the bathroom...

The closet under the stairs is staying as a closet, and we will have a desk where the filing cabinet is.

Aside from this main room we have a laundry room at the back, a room where the boiler is, and cold storage. We are only renovating the main room into a rec room / play room / office. A lot to put in one space, yes but we think it's doable. Oh, and add storage. Obviously.

Here is a very very very rough sketch of what we are looking to do:

The height of our basement is a bit over 6 feet, so we aren't digging down. This will be a space to lounge and a space for kids so we don't feel that we need to go to the added cost of digging down for a few inches. I can't wait for better light down there and usable space.

This will be the first project in the whole house that we will not be touching (no demo, no drywall, etc...just painting it at the end).

Have you renovated your basement? Any must have's? Any lessons learned?

Monday, August 12, 2013

Project Baby Room - before

Alirght...now that the flooring is done it's time to get moving on Project Baby Room! I intended to post this post a million years ago...before the flooring project...but then life (and flooring) got in the way so here we are (our progress on the baby's room in those million years has been null). Like many other people, this project could easily be named Project-get-rid-of-all-of-our-junk.

The baby will be taking over the room that we used to use as our office. To be honest, the only time we used it as an office was when we were working from home (and not working at the dining table). Overall it provides extra storage for my clothes and shoes, some books, university textbooks (ha!) and an old computer (we both have laptops that we use day to day).

Here's a picture in all its beauty:

In a word: Messy.

This is not how it was day to day when we had it as an office, but more of a transition photo where we are getting ready to get rid of stuff.

The Mr. sold the desk and the chair via Craigslist in less than 24 hours. He has a real knack for posting things at the right price and the right time (sort of like when he sold our window A/C unit last year in the height of a heat wave...Sales 101).

Now we need to figure out what goes IN here. And there comes the fun, and the challenge. We will be leaving the wall colour as is, which is a greeny-gray colour, and we have some unique challenges along that back wall with the radiator, the window with no room for curtains on either side, and the angled closet. At least it's all on one wall so we can make full use of the other walls. And, as a reminder, we don't know whether this little human is a boy or a girl, so gender neutral territory is where we're heading.

We currently have a dresser/change table, crib, and glider (to be made over...) Do you have any "must haves" or key tips for the baby room (or babies in general...let's get serious I'll take all I can get!)

Thursday, July 18, 2013

2013 Goal Update

Since we're in July and now officially halfway through 2013, I thought I would check in on my Big Hairy Audacious goals that I set in January.  Yes, wayyyy back in January (doesn't it feel like ages ago?). Here's an update on my goals:

1. Finish the Living Room
Status: hmmmm not so different from January. I had big pillow goals, and my mom made fantastic pillow covers....however I (or my pregnancy brain) gave her the wrong dimensions. I needed 2 18x18 and 2 20x20 and I asked for 2 18x18 and 2 16x16. Woops. No wonder there was so much extra fabric left over. Does anyone need 16x16 navy and white pillow covers? Oh, and we are STILL SEARCHING for a coffee table that is "airy" but not glass.

2. Flooring
Status: This is HAPPENING, we ordered the floor yesterday. And it has to happen in August so it's done pre-baby. We decided to only re-do the flooring on the main floor, but it will be great to have consistent flooring throughout the main floor (currently we have carpet, bad quality cherry hardwood, and peach tile. Do you see why we don't love it?). We want to go with a medium stain on the hardwood and I love seeing grain so we are looking for oak floors. I still want tile for the entry way and the kitchen (I like the practicality of tile over hardwood), so I'm on the look out for options. I was thinking charcoal tile in a 3x12 to mimic hardwood planks, the colour along these lines, but with darker grout:
deep gray porcelain tiles from Marazzi - MARAZZI Porfido 12 in. x 6 in. Charcoal Porcelain Floor and Wall Tile.  http://www.homedepot.com/p/MARAZZI-Porfido-12-in-x-6-in-Charcoal-Porcelain-Floor-and-Wall-Tile-UJ56/202072420#.UZLgXaLbO8A.  $3.99/sq ft
 via

The only thing I am not sure of is if every little water drop will show on the charcoal tile (and thereby drive me crazy). Thoughts?

3. Bathroom Reno
Status: DONE!! This one actually happened, and it was a big one (you can see the full reveal here). We've even hung a towel bar and towel hooks since I did my reveal. We couldn't love this bathroom more. I would say this was the biggest "reno" that we've done in the house, and adding 20" to the bathroom was the smartest move we could have done. I love how everything turned out and am still amazed and how airy it feels (and how the 20" we stole from the guest room pretty much makes NO difference over there, and every difference in the bathroom).

4. First Sundays
Status: This was my plan for the first Sunday of every month, to ensure it didn't include running around to Costco or doing a million errands. It worked pretty well the first few months, but then as it got nicer outside we got busier, and we had some projects on the go so it's fizzled.

One goal that we didn't list at the time was Project Baby. Consider this Goal #5, with the least wiggle room out of all the goals. I'll do another post about how we're fairing in that regard and what progress we've made on the baby room (hint: not much).

How are your 2013 goals coming along? Do you check in with them part way through the year, or is it more of a new year's resolution that gets lost by the time summer comes around? I hope everyone is coping (or loving??) this heat that is finally here - it's summer folks :)

Monday, June 10, 2013

Bathroom Reveal!

Yes folks, it's time for the goods...

About a week ago (or two? honestly time is flying and I'm pretty sure May only lasted a day or two, so you can't rely on me for accruate time estimates) - our bathroom became functional! If you follow on twitter / instagram you know that we were waiting for glass to be installed at the end of the shower. Sort of important for us to (a) have a shower curtain and (b) actually be able to use the shower!  Well, it got installed and my first shower in there was glorious (and continues to be).

Here's the final product:


If you remember (I don't want to remember), this is what it looked like before:
Lovely peach-brown floor tile, 5' wide in all its glory. Check out my previous posts for demo, and progress here and here.

Those 20" that we moved the wall into the guest room REALLY pay off, don't you think?

And now, more pretty...


The shower feels amazing - so big and light filled with the glass at one end, and the tile all the way to the ceiling (or maybe it was the fact that we were starting to get used to our basement bathroom...where the shower head is mounted only about 5'5" high!)

We still have some functional / style elements to add (like a towel rack - can someone please tell me where to get a chrome, multi-arm swiveling towel rack??), but overall the big work in the bathroom is over and we are back in business! 

Sources:
Tile (floor and wall tile): The Tile Store
Vanity, faucets, tub, tub fixtures (excluding shower head): Tubs
Mirrors, lighting: Lowes
Shower head, toilet paper holder: Home Depot
Shower curtain: Home Outfitters
Paint: Benjamin Moore PaperWhite (OC-55)

Monday, January 21, 2013

Living room chair - after!

I hope you all had a great weekend...mine was pretty relaxing with a big highlight: we picked up our re-upholstered chair this weekend...and it looks AMAZING! I wanted to wait to post it until I had the right pillow for it (remember I posted this gorgeous one? Yah, still can't justify that cost), but I just can't wait to post it. It is gorgeous.

If you remember, we nabbed this chair off Craigslist:
 
I commissioned the lovely Lindsey from Recreated to re-do the chair for me. She moonlights in reupholstery at Re:Style Studio and did a wonderful job on our chair...here's the finished product:
Fabulous, non?

Here are some more shots of the details:
That double piping around the foot is perfection...

 more amazing double piping details...so nice...


Isn't it handsome?

Sources:
Chair: craigslist
Re-Upholstery: Lindsey from Recreated
Fabric: Eurofab

Wednesday, October 17, 2012

Vintage wine crate makeover

You've probably seen vintage wine crates popping up here and there - I like the look of them for storage, and one of my favourite inspiration pics of one way to use them is here:

Doesn't that look great in the nursery? I have also seen crates used as mini-gardens among other things. I have seen them at antique shops / fairs, but they always came with a hefty price tag ($40 for an old wooden box is a bit much in my books). As luck would have it, I was coming home one evening after work and saw a wine crate sitting on a neighbour's recycling bin, ready for the next day's garbage collection. The neighbour was outside, so I asked her if I could have it, she said sur,e so I grabbed it and took it home! I'm pretty sure she thought I was a little loony taking her wooden wine crate, but so be it. All in the name of DIY I tell ya.

I decided to stain it and figure out what I would do with it later....here's what it looked like:
Notice it's from France. Score.

I scraped off all the stickers and removed the nails and staples that had held the top on the box. Then I broke out the Walnut stain and got to work.


That's what it looked like with one coat...check back tomorrow to see the finished product and what I decided it's premiere would be!

Tuesday, September 11, 2012

DIY fabric covered tray

Today I'm keeping it light, but definitely remembering 9/11. My thoughts go out to all who were affected or suffered loss that day.

Onto the lighter side....

All summer the Mr. and I lamented about needing a tray to carry dishes outside for eating al-fresco. I finally found one at the end of August that needed a little face lift.
It was filthy...so I did a good clean on it and then started to remove the old shelving paper that was lining it.

Fortunately it peeled off pretty easily.

I decided I didn't want to paint the tray (been there, done that) so I thought I would line it with fabric. Initially I thought I would cover it so we could wipe it down, but the Mr. said we shouldn't really need to do that since we'll be using it primarily for dishes before / after eating, not for actual food. Good point.

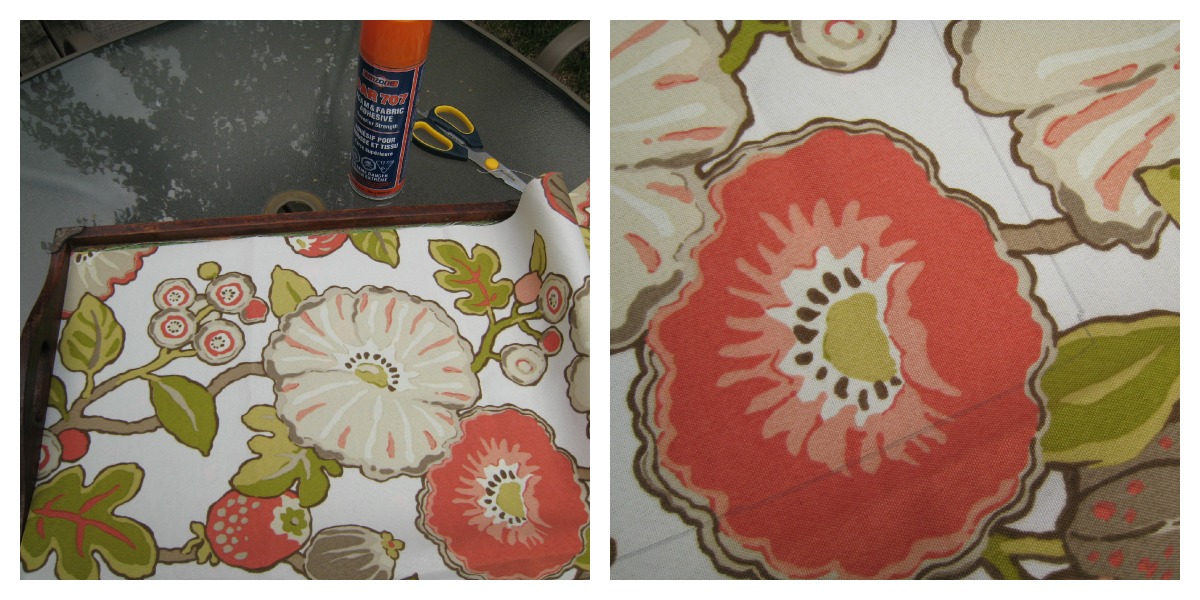
I broke out some extra fabric I had from our master bedroom bench. it's durable since it's outdoor fabric which is a bonus. I laid it over the tray to measure, and traced the inside of the tray with pencil.
I cut out the fabric and sprayed the back with spray-adhesive, set it on the tray and pushed out any creases / bubbles (sort of like putting on a new iPhone cover...but wayyyyyy easier).

It's hard to tell from this photo, but the edges weren't great since I just cut the fabric and didn't hem it. The fabric was fraying a bit and not perfectly square with the tray. So I decided to add some ribbon to finish the edges off.

Related Posts Plugin for WordPress, Blogger...